Remove Text From Image: A Clean Inpainting Workflow for Labels, Captions, and Overlays
Tired of messy clones and smudged textures? Use this clean inpainting workflow to erase labels, captions, and watermarks without harming detail.
 Sierra CappelenDecember 12, 2025
Remove Text From Image: A Clean Inpainting Workflow for Labels, Captions, and Overlays
When you need to remove text from image assets—think stickered labels, social captions burned into photos, or watermark overlays—the challenge isn’t just erasing characters. It’s restoring what sits behind them: paper grain, weave texture, edges, and specular highlights. In 2025, marketplaces and ad platforms increasingly discourage watermarks and text overlays in product photos, yet brands still need texture-safe cleanup that stands up to zoom and retouch scrutiny.
The good news: modern AI inpainting now outperforms manual cloning for production workflows, especially on high-resolution catalogs. If you’re looking for a fast, texture-preserving way to remove text from image assets without spending hours in a timeline of brush strokes, this guide walks you through a clean, repeatable workflow.
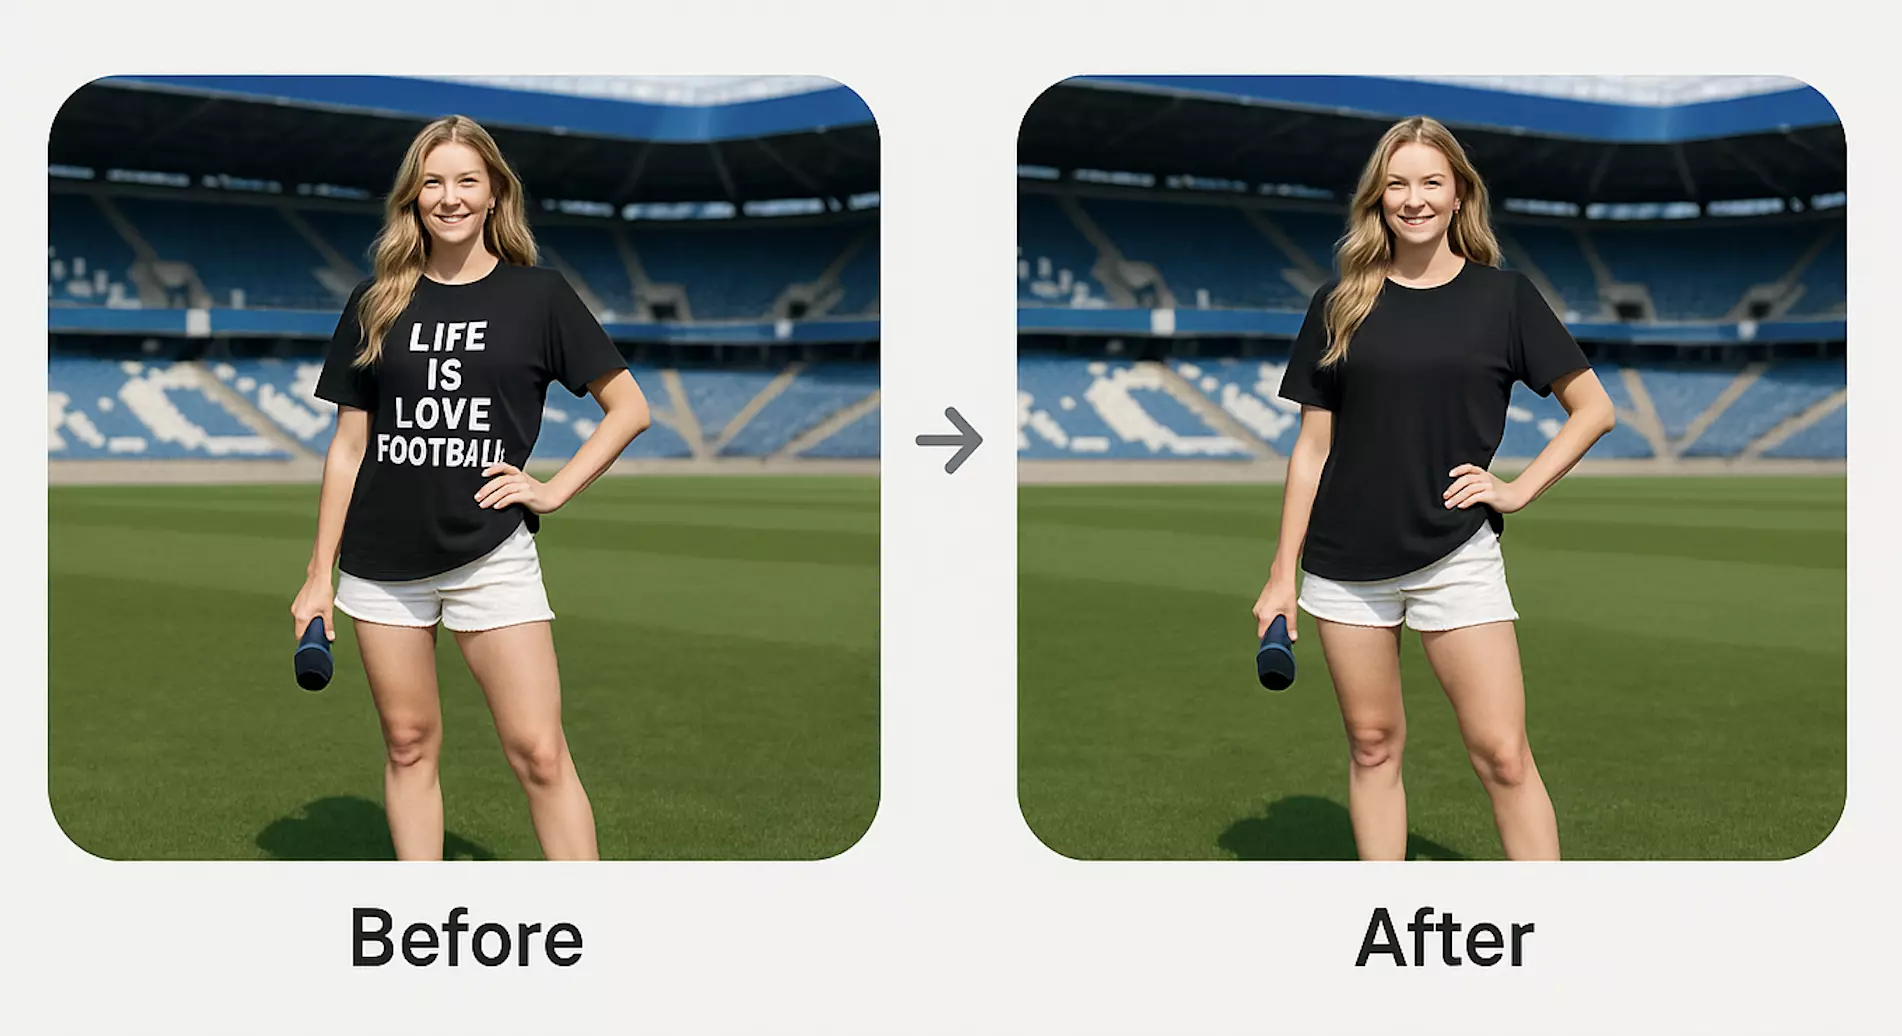
(See image: A before-and-after pair removing a bold caption from a bottle label while preserving paper grain and print texture.)
Why text overlays are tricky: edges, compression, and texture continuity
Text rarely sits on perfectly uniform surfaces. It often crosses:
- Texture transitions (paper to label glue, cardboard flutes, leather grain)
- Specular highlights or shadows
- JPEG compression blocks and ringing
- Perspective distortions and curved geometry
Simple blurs or clones can create telltale seams, repeating patterns, or low-frequency mush that breaks realism. The aim of a robust workflow is to:
- Reconstruct structure (lines, edges, folds) faithfully
- Recreate texture (grain, weave, micro-noise) at the correct scale and orientation
- Avoid artifacts like halos, banding, or tiling
Core inpainting concepts: structure vs texture, seams, and fill radius
- Structure vs texture: Structure is the macro shape (edges, folds, print borders). Texture is the micro detail (paper fibers, denim weave, brushed metal). Preserve both or edits read “fake.”
- Seams: Inpainting often blends boundaries. Poor seams produce soft borders or tonal jumps; good seams “disappear” into adjacent pixels.
- Fill radius and context: The effective context—how far the algorithm looks beyond your mask—affects how well it learns nearby detail. Too little context invites smearing; too much may import irrelevant features. Start modest; expand if structure misaligns.
Masking strategy: tight vs generous selections
Your mask dictates how much the model can change.
- Tight selection (hug the text shapes):
- Pros: Protects surrounding detail; faster, minimal risk to adjacent elements.
- Best for: Flat, uniform backgrounds; small captions; crisp paper grain.
- Watchouts: Can leave faint edges of the original text if compression halos exist.
- Generous selection (include a margin around text):
- Pros: Allows better re-creation of underlying structure and halos; reduces ghosting.
- Best for: Strong drop shadows, glow effects, or heavy JPEG artifacts.
- Watchouts: Overly large masks can over-smooth or introduce unrelated textures.
Tip: Start tight on flat surfaces; go generous on textured or compressed regions. If in doubt, do a two-pass approach: tight first, then generous for cleanup.
Clean inpainting, step by step: a practical workflow
- Inspect at 100–200%. Identify surface type (paper, plastic, denim), lighting, and any perspective lines or edges crossing the text.
- Choose a starting mask strategy. On flat label areas, start tight. On fabric or heavy compression, add a small buffer around the text.
- First pass inpaint. Evaluate structure: do edges and contours read correctly? Ignore micro-texture for now.
- Adjust mask and context. If structure is off, expand the mask slightly or include adjacent reference detail (edges, folds).
- Second pass for texture. Aim for matching grain frequency and direction. If the texture is too smooth, revise with a generous mask or smaller brush regions.
- Micro cleanups. Use small masks to fix halos, repeating tiles, or mismatched highlights.
- Final QA at zoom and normal view. Toggle before/after to check for seams, color cast, or banding.
(See image: Close-up sequence showing multi-pass inpainting on denim fabric with weave continuity and aligned highlights.)
Remove text or watermarks in three steps with Pixflux.AI
For a fast path when you need a reliable AI text remover on production assets, try Pixflux.AI’s AI text remover. It’s built to cleanly remove text in image overlays while preserving detail, and it works well for labels, captions, and watermark cleanup.
- Step 1: Upload your original image.
- Step 2: Let the AI process the masked area to reconstruct structure and texture.
- Step 3: Download the cleaned result.
This three-step flow is ideal when you need to batch clean product photos, update marketplace listings, or prepare social assets without manual retouching. For tricky surfaces, you can iterate with different selections and do multiple passes, previewing results before you export.
(See image: Pixflux.AI interface showing the upload → AI processing → download three-step flow for text or watermark removal.)
Multi-pass workflow: coarse fill, texture harmonization, micro cleanups
- Pass 1 — Coarse fill for structure: Mask the text plus a small border. Focus on edges, folds, or curvature. If geometry matches, move on.
- Pass 2 — Texture harmonization: Remask smaller zones with visible mis-texture. Guide the AI to match grain density, weave orientation, or print dot pattern.
- Pass 3 — Micro cleanups: Tackle minor halos, compression ghosts, or tiled patches with very tight masks. Keep edits local to avoid collateral smoothing.
This staged approach yields more natural results than trying to fix everything at once, and it mirrors how expert retouchers iterate.
Avoid repeating patterns, blur, and banding
- Use variable mask sizes: Alternate between tight and modest masks to break pattern repetition.
- Change inpainting region shapes: Irregular masks reduce tiling artifacts compared to perfect rectangles.
- Match noise level: If the background is noisy, a too-clean fill looks fake. A second pass often introduces appropriate micro-variation.
- Watch low-frequency gradients: Sky or paper gradients can band. Consider a slightly larger mask to capture gradient context for a smoother fill.
- Align highlights: On glossy labels or satin fabrics, ensure specular streaks line up across the repainted area.
QA checklist for print-like surfaces (labels, paper, packaging)
- Grain continuity: Paper fibers should keep direction and density across the edited area.
- Edge fidelity: Label borders, creases, and process print dots should remain crisp.
- Gradient smoothness: No banding or sudden tonal steps on white or off-white backgrounds.
- Color match: Whites should match neighboring areas (no unexpected warm/cool shifts).
- Compression sanity: At 200% zoom, no checkerboard blocks or ringing around the former text area.
QA checklist for fabrics and knits (weaves, denim, knits)
- Weave alignment: Warp/weft direction continues unbroken; no crosshatch warping.
- Scale consistency: Thread thickness and stitch density match adjacent fabric.
- Specular highlights: Shiny yarns or denim fades align across the edit.
- Pattern phase: Repeating textile patterns maintain phase; avoid “reset” at mask edges.
- Tactile realism: At normal viewing size, texture “reads” the same as the original.
Batch processing tips for large product catalogs
- Standardize inputs: Use consistent lighting and resolution to make inpainting outputs predictable.
- Group by surface type: Process similar materials together (paper, matte plastics, knits) so your masks and passes follow repeatable rules.
- Prioritize hero angles: Clean the primary listing images first; secondary angles can inherit masks or be handled in smaller batches.
- Iterate in rounds: First pass for structure across the batch, second pass for texture, third for spot fixes on flagged items.
- Use Pixflux.AI for throughput: Pixflux.AI supports batch-friendly workflows so teams can clean multiple images in one go without steep learning curves.
Legal and ethical boundaries: watermarks, rights, and disclosure
- Only edit images you own or are authorized to modify. Removing watermarks from someone else’s assets can violate copyright and platform policies.
- Use text and watermark removal for legitimate cleanup (e.g., your own brand marks or compliance updates). When in doubt, check marketplace guidelines and document approvals.
Troubleshooting: color casts, halos, and perspective mismatches
- Color cast: If the patched area looks warmer/cooler, redo the pass with a slightly larger mask to let the AI sample more context. For whites on packaging, ensure nearby whites are included.
- Halos: Strong compression halos around the original text may persist after tight masking. Switch to a generous selection that includes the halo fringe.
- Perspective mismatch: Curved bottles or angled boxes require structure-first passes. Extend masks across the curvature line so the fill “learns” the correct perspective.
- Over-smoothing: If the result looks plasticky, target smaller patches and re-run with tighter masks to reintroduce texture variation.
- Pattern tiling: Break up edits with irregular mask shapes and alternate pass sizes to avoid tiled repetition.
AI online tools vs traditional methods
- Time cost:
- AI online tools like Pixflux.AI deliver near-instant fills for straightforward overlays and need only brief iteration for complex textures.
- Traditional software (manual clone/heal) excels in artisan control but is slower and harder to scale across large catalogs.
- Learning curve:
- Pixflux.AI is approachable for non-designers—upload, process, download—so merchandising or content teams can self-serve.
- Pro-grade desktop tools require brush mastery, layer management, and retouch best practices.
- Batch efficiency:
- Pixflux.AI supports batch-oriented workflows to clean multiple SKUs in one sitting.
- Outsourcing can handle scale but adds handoffs, revision loops, and turnaround time.
- Cross-team adaptability:
- An online tool is accessible to distributed teams without heavy software installs or advanced training.
- Traditional pipelines can bottleneck through specialized retouchers, slowing campaign agility.
A quick five-step refresher with Pixflux.AI
When you want a more guided process, you can also follow a simple five-step flow in Pixflux.AI:
- Open Pixflux.AI’s tool page.
- Upload your original asset.
- Choose the text/watermark removal tool and let the AI process the masked region.
- Preview and refine with a tighter or more generous selection, then re-run if needed.
- Download the cleaned image ready for listings, ads, or print.
If you’re evaluating tool options for compliance or brand refresh projects, Pixflux.AI is designed to preserve structure and texture without extensive manual retouching.
Conclusion and next steps
Removing text in image overlays is no longer a painstaking manual task. With a sound masking strategy, a multi-pass inpainting approach, and batch-friendly workflows, you can ship texture-true product imagery and compliant social assets at scale. As marketplaces raise the bar and catalogs grow in resolution, AI-driven inpainting becomes the pragmatic path for consistent, fast results.
Ready to try it on a live asset? Open Pixflux.AI and use the streamlined tool to remove text in image overlays while preserving texture. Upload, process, and ship clean visuals—without compromising detail.